EpitheliumJ Tutorial
Installation
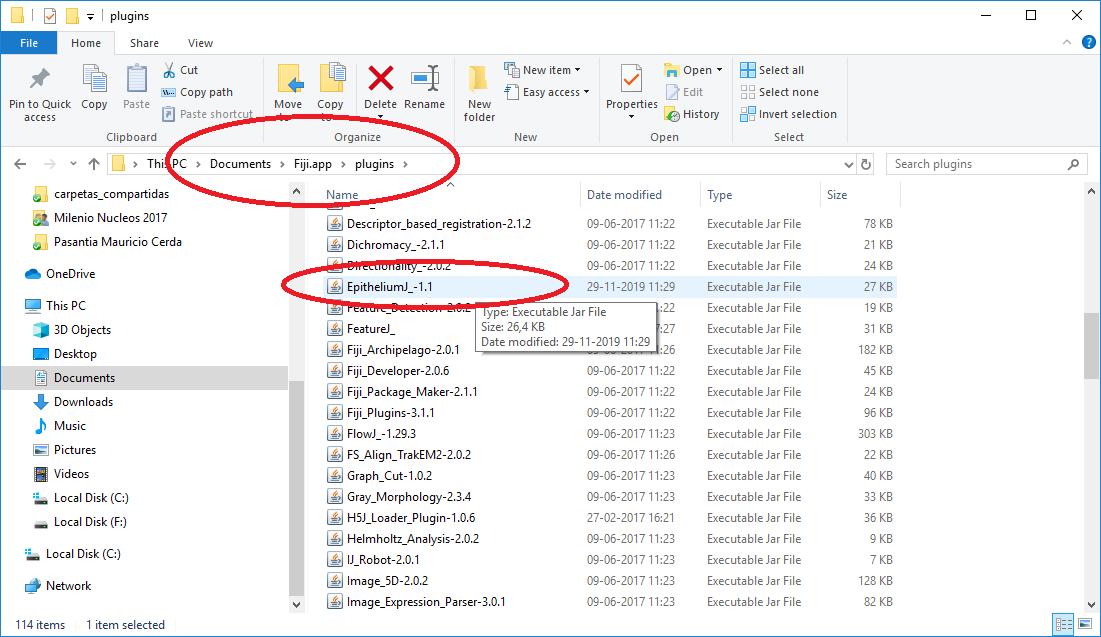
Install the plugin by downloading the .jar file, and locating it in the plugins folder.
Sphere projection
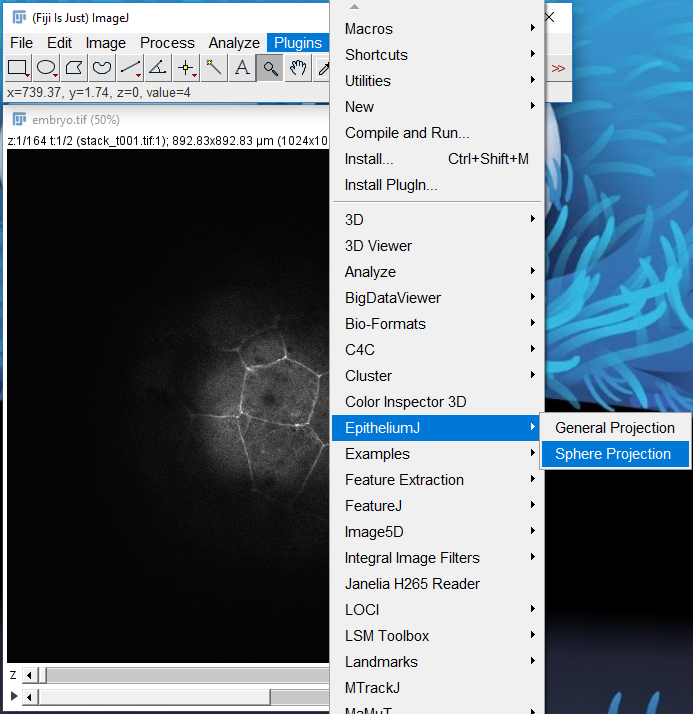
1.- Open the stack you want to process. Calibrate your stack (set voxel size in um at menu Image / Properties…). Select the Sphere projection option in the EpitheliumJ menu.
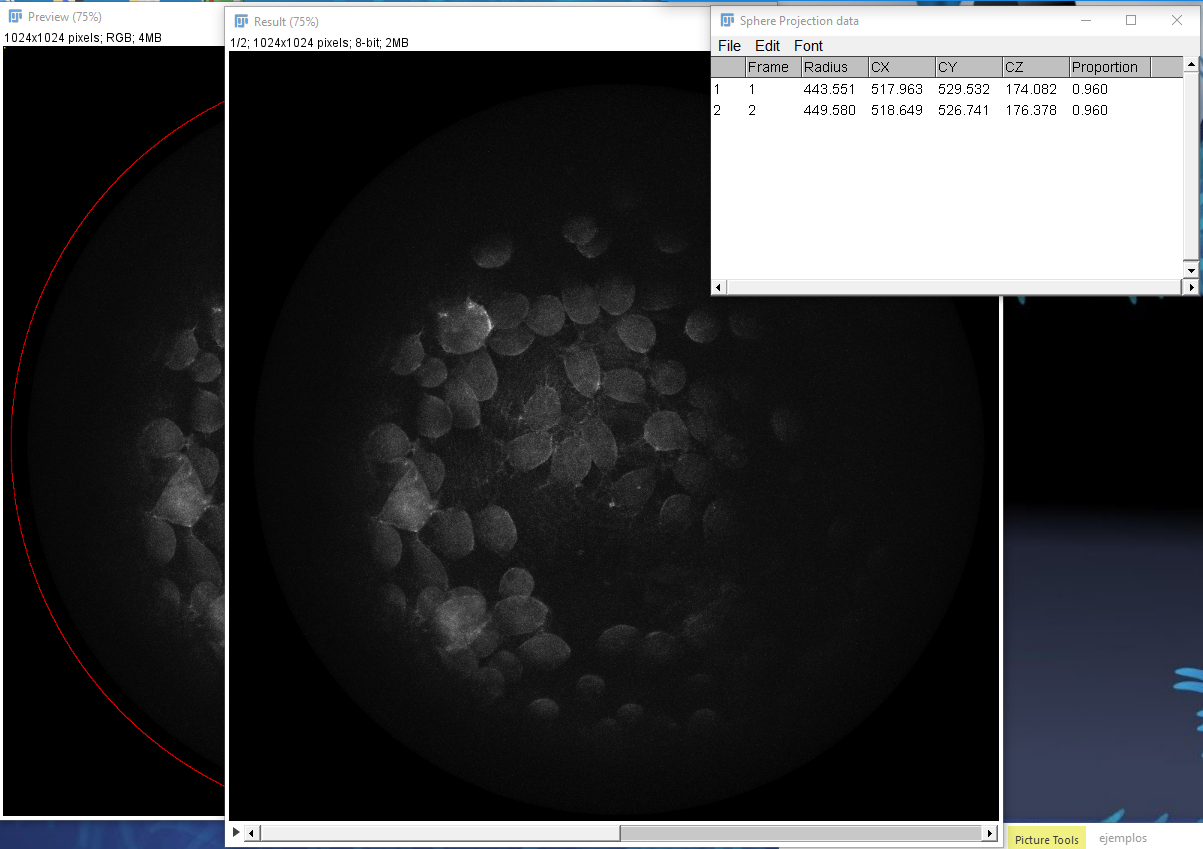
2.- Move the “Radius proportion” slider until the cell layer you want to study is visible.
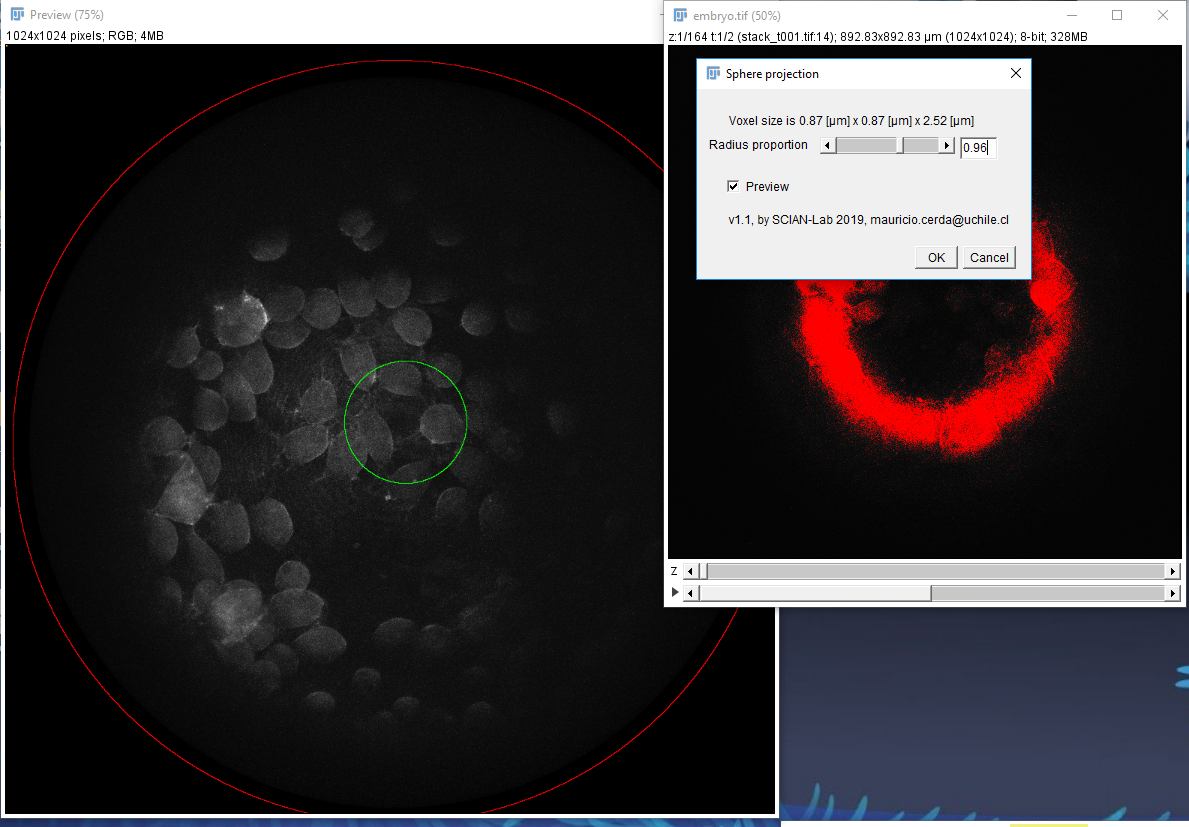
3.- The result is 2D, and also provides a table with the estimated center and radius of the object (in the example a killifish embryo).
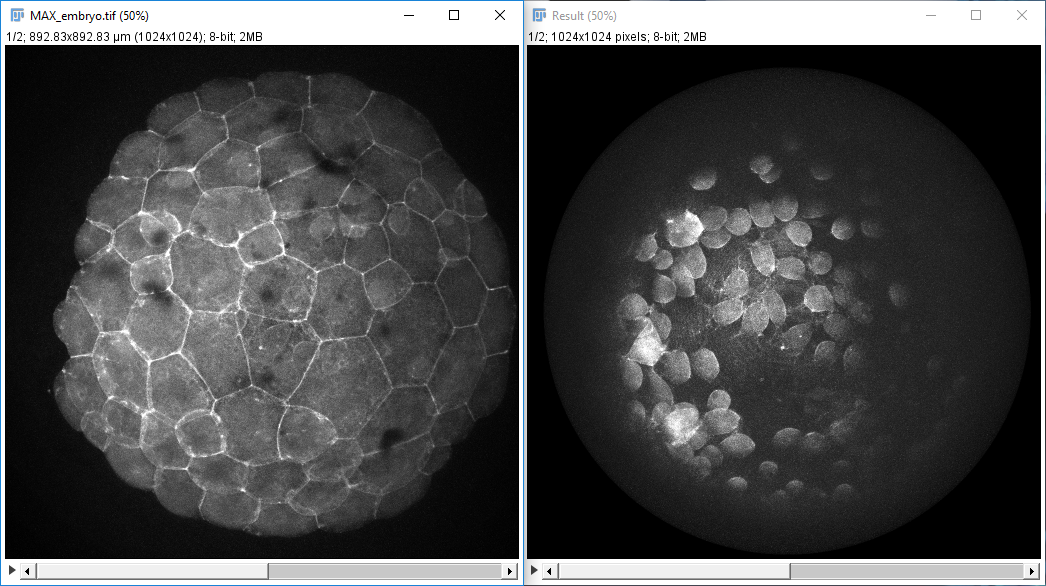
4.- In the image a comparison of a “normal” z-projection (left) and the obtained spherical projection.
General projection
1.- Open the stack to process, and select the general projection option in the EpitheliumJ menu.
2.- Correct the Z matrix (grid) to show the layers of your study. You can preview by using the button “Preview this frame”. Note that in hyperstack first and last frames are mandatory, but you can manually configure more frames if necessary.

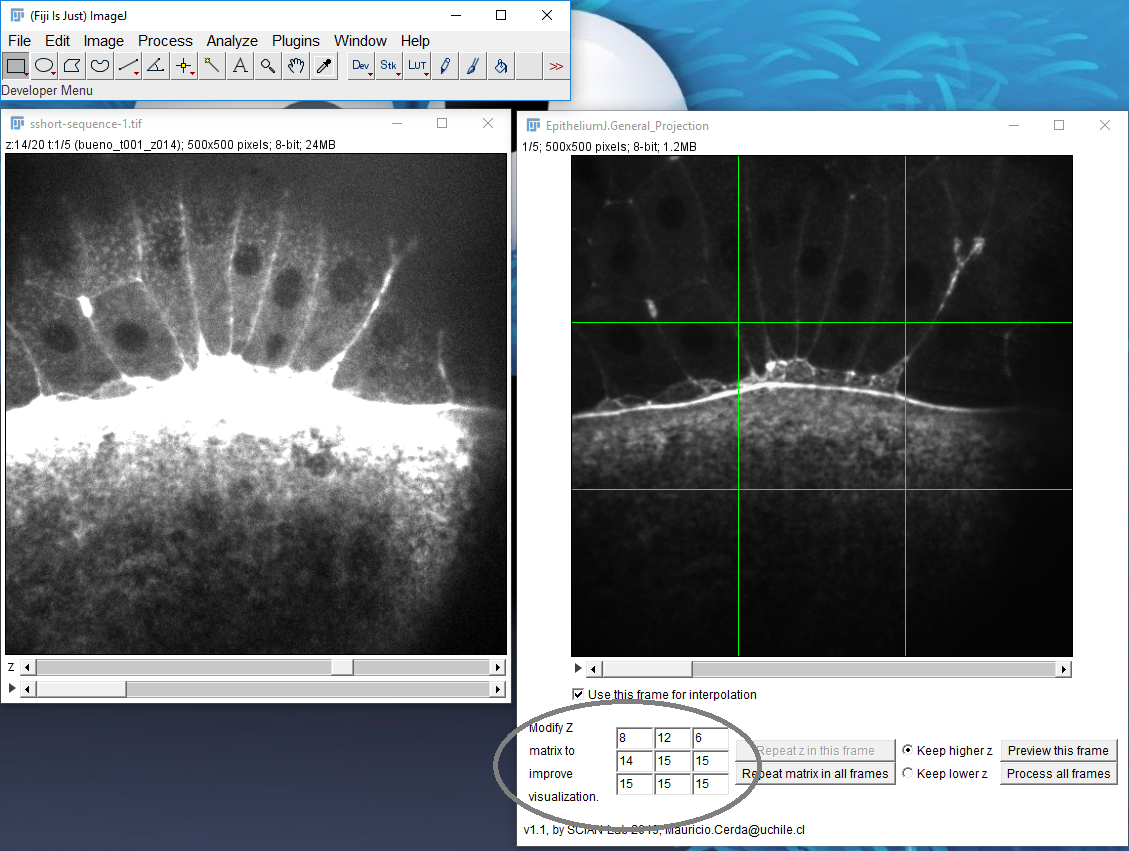
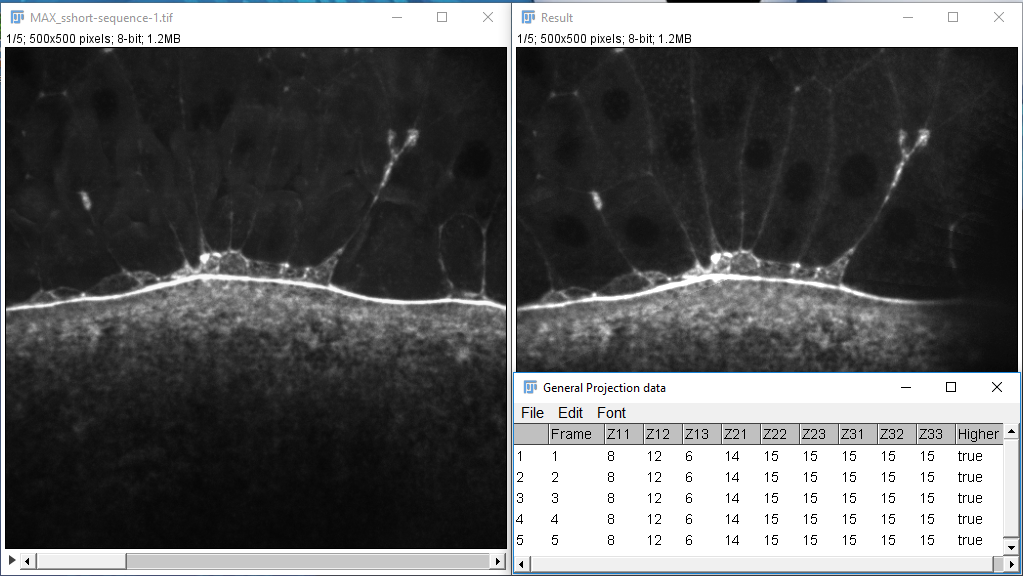
3.- In the image a comparison of a “normal” z-projection (left) and the obtained projection. Note a summary table shows the Z matrix used to generate the projection.
